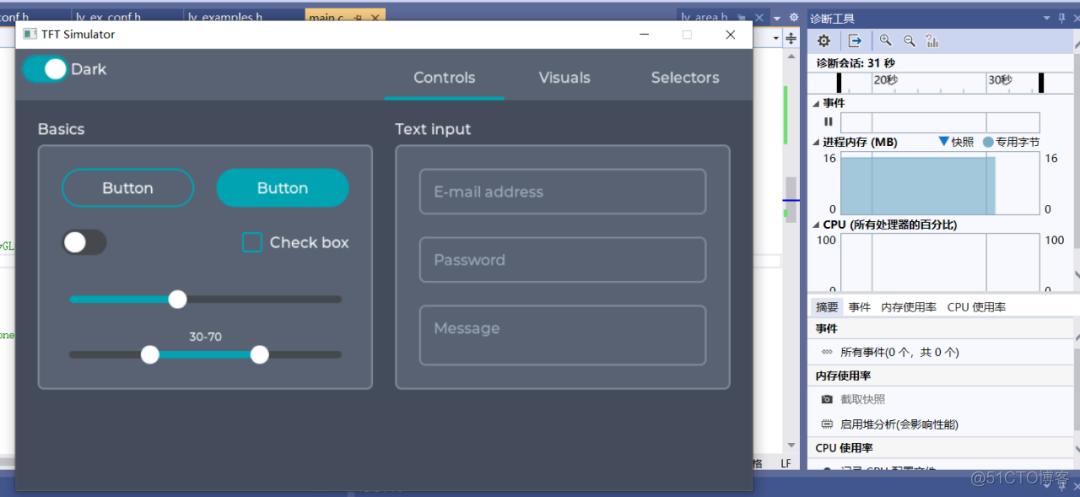
git clone --recurse-submodules https://github.com/lvgl/lv_sim_visual_studio.git这可以克隆lv_sim_visual_studio_sdl 及其所需的几个子模块submodules什么是git submodules?有这么个例子:每个公司的系统都会有一套统一的系统风格,或者针对某一个大客户的多个系统风格保持统一,而且如果风格改动后要同步到多个系统中;这样的需求几乎每个开发人员都遇到,下面看看各个层次的程序员怎么处理:假如对于系统的风格需要几个目录:css、images、js普通程序员,把最新版本的代码逐个复制到每个项目中,如果有N个项目,那就是要复制N x 3次;如果漏掉了某个文件夹没有复制…@(&#@#文艺程序员,使用Git Submodule功能,执行:git submodule update,然后冲一杯咖啡悠哉的享受着lv_sim_visual_studio_sdl 仓库需要依赖于:lvgl、lv_drivers、lv_exampleslvgl、lv_drivers、lv_examples是lvgl官方维护的三个GitHub仓库因为lv_sim_visual_studio_sdl 仓库要用到lvgl、lv_drivers、lv_examples三个仓库的内容,照理说lvgl官方应该把这三个仓库里面的内容也一起上传到lv_sim_visual_studio_sdl 仓库中但是这样做的话,之后lvgl、lv_drivers、lv_examples仓库内容有更新的话,就需要手动同步lv_sim_visual_studio_sdl 里的相关内容,显然很不方便所以这里使用了Git Submodule功能,这在克隆lv_sim_visual_studio_sdl 仓库时自动下载其相关的3个子模块(lvgl、lv_drivers、lv_examples)方法二:下载源码压缩包如果方法一下载不成功,则可以使用方法二下载lv_sim_visual_studio_sdl 压缩包:此时lv_sim_visual_studio_sdl \visual_studio_2017_sdl目录下的lvgl、lv_drivers、lv_examples三个文件夹的内容都是空的,所以需要分别从lvgl的GitHub仓库上下载lvgl、lv_drivers、lv_examples,并分别拷贝到lv_sim_visual_studio_sdl 目录的对应文件夹下按以上两种方式下载得到的lv_sim_visual_studio_sdl 内容如:双击打开lv_sim_visual_studio_sdl.sln(前提是已经安装好vs2019,不知道其它版本是否可以):主函数的内容如:// 微信公众号:嵌入式大杂烩int main(int argc, char argv){ /Initialize LittlevGL/ lv_init(); /Initialize the HAL for LittlevGL/ hal_init(); / Demos, benchmarks, and tests. Uncomment any one (and only one) of the functions below to run that item. / lv_demo_widgets(); / There are many examples of individual widgets found under the lv_examples/src/lv_ex_widgets directory. Here are a few sample test functions. Look in that directory to find all the rest. / //lv_ex_arc_1(); //lv_ex_cpicker_1(); //lv_ex_gauge_1(); //lv_ex_img_1(); //lv_ex_tileview_1(); while (1) { / Periodically call the lv_task handler. It could be done in a timer interrupt or an OS task too./ lv_task_handler(); Sleep(10); /Just to let the system breathe / }内容大致与我们上一篇的:LittlevGL在STM32上的移植使用 的主函数内容一样这些demo都是lv_examples下的demo,下面编译运行lv_demo_widgets这个demo:下面我们在模拟器上编写一个测试demo,编写好之后移到我们上篇笔记移植好的STM32工程中进行测试所以我们模拟器设置的lvgl参数(lv_conf.h文件)尽量与我们stm32工程的lvgl配置参数(lv_conf.h文件)一样至少分辨率得设成一样:编写一个简单的登录页面demo:// 微信公众号:嵌入式大杂烩void login_page(void){ / 创建用户名标签 / lv_obj_t user_name_label = lv_label_create(lv_scr_act(), NULL); lv_label_set_text(user_name_label, "UserName:"); lv_obj_align(user_name_label, 0, LV_ALIGN_IN_TOP_LEFT, 5, 100); / 创建用户名文本框 / lv_obj_t user_name_ta = lv_textarea_create(lv_scr_act(), NULL); lv_textarea_set_text(user_name_ta, "ZhengN"); lv_textarea_set_pwd_mode(user_name_ta, false); lv_textarea_set_one_line(user_name_ta, true); lv_textarea_set_cursor_hidden(user_name_ta, false); lv_obj_set_width(user_name_ta, LV_HOR_RES / 2); lv_obj_align(user_name_ta, user_name_label, LV_ALIGN_OUT_RIGHT_MID, 5, 0); / 创建密码标签 / lv_obj_t password_label = lv_label_create(lv_scr_act(), NULL); lv_label_set_text(password_label, " Password:"); lv_obj_align(password_label, user_name_label, LV_ALIGN_OUT_BOTTOM_LEFT, 0, 20); / 创建密码文本框 / lv_obj_t password_ta = lv_textarea_create(lv_scr_act(), NULL); lv_textarea_set_text(password_ta, "12345678"); lv_textarea_set_pwd_mode(password_ta, true); lv_textarea_set_one_line(password_ta, true); lv_textarea_set_cursor_hidden(password_ta, true); lv_obj_set_width(password_ta, LV_HOR_RES / 2); lv_obj_align(password_ta, password_label, LV_ALIGN_OUT_RIGHT_MID, 5, 0);}在模拟器运行:下面我们移到上一篇文章的STM32工程里首先,新建一对头、源文件存我们的测试demo:编译、烧录、运行:以上就是基于vs2019的lvgl模拟器的使用分享,可以很方便地在模拟器上先做实验,然后再移入嵌入式平台猜你喜欢:手把手教你在STM32上使用nanopb 静态链接与动态链接(Linux) C语言中的goto语句该不该使用? 例说嵌入式实用知识之JSON数据 1024G 嵌入式资源大放送包括但不限于C/C++、单片机、Linux等私信回复1024,即可免费获取

(图片来源网络,侵删)


0 评论